


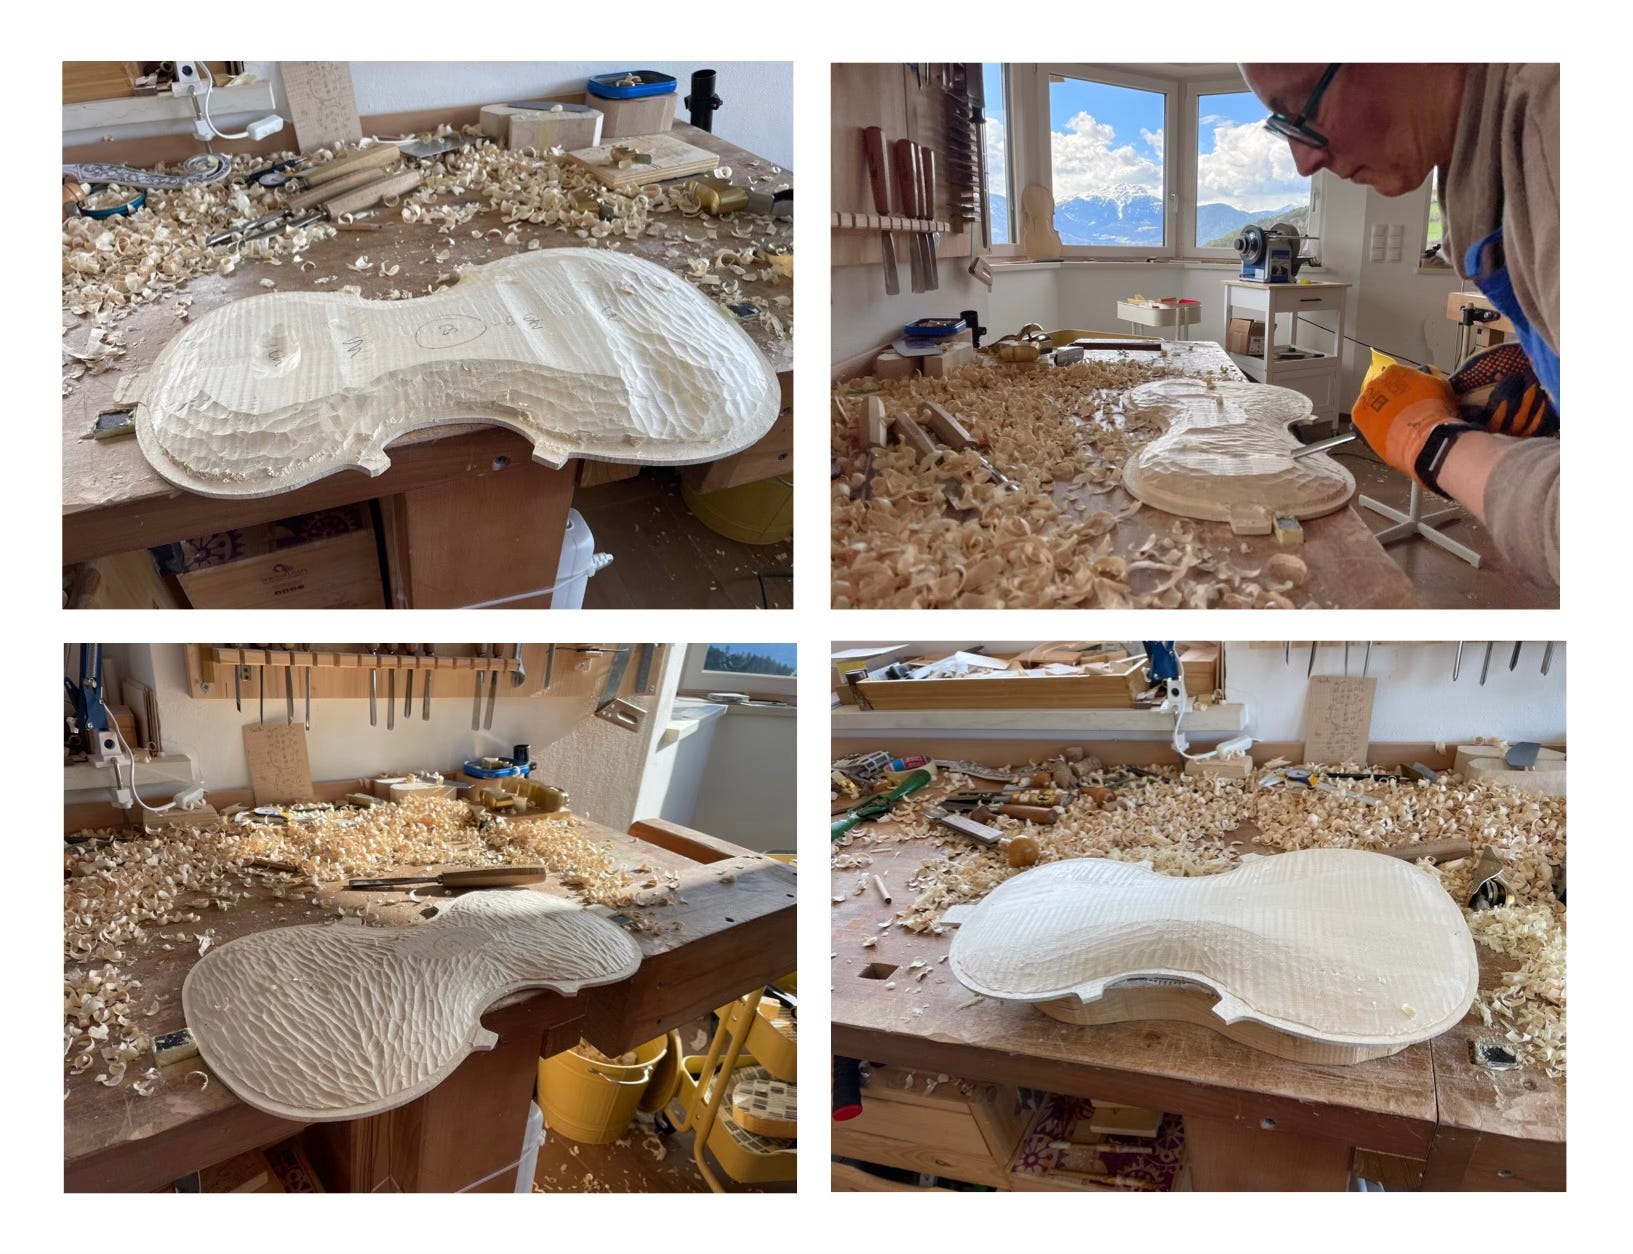
As I mentioned in our last issue, when I (Daniela) carve the plates, I start on the inside. This is not a traditional Cremonese way, and I am unsure when or where it comes from. For me, it came from the suggestion of a dear friend. Not only did this way feel more instinctive to me, but I was intrigued by the fact that some features of old violins from northern Italy or Tyrol, like structural triangles in front of the blocks or a particular shape of archings, come out naturally working this way.
I’m showing now my process step by step.
As I already planned the desired height of my archings (as explained in the previous issue), I plane my plates to the desired number.
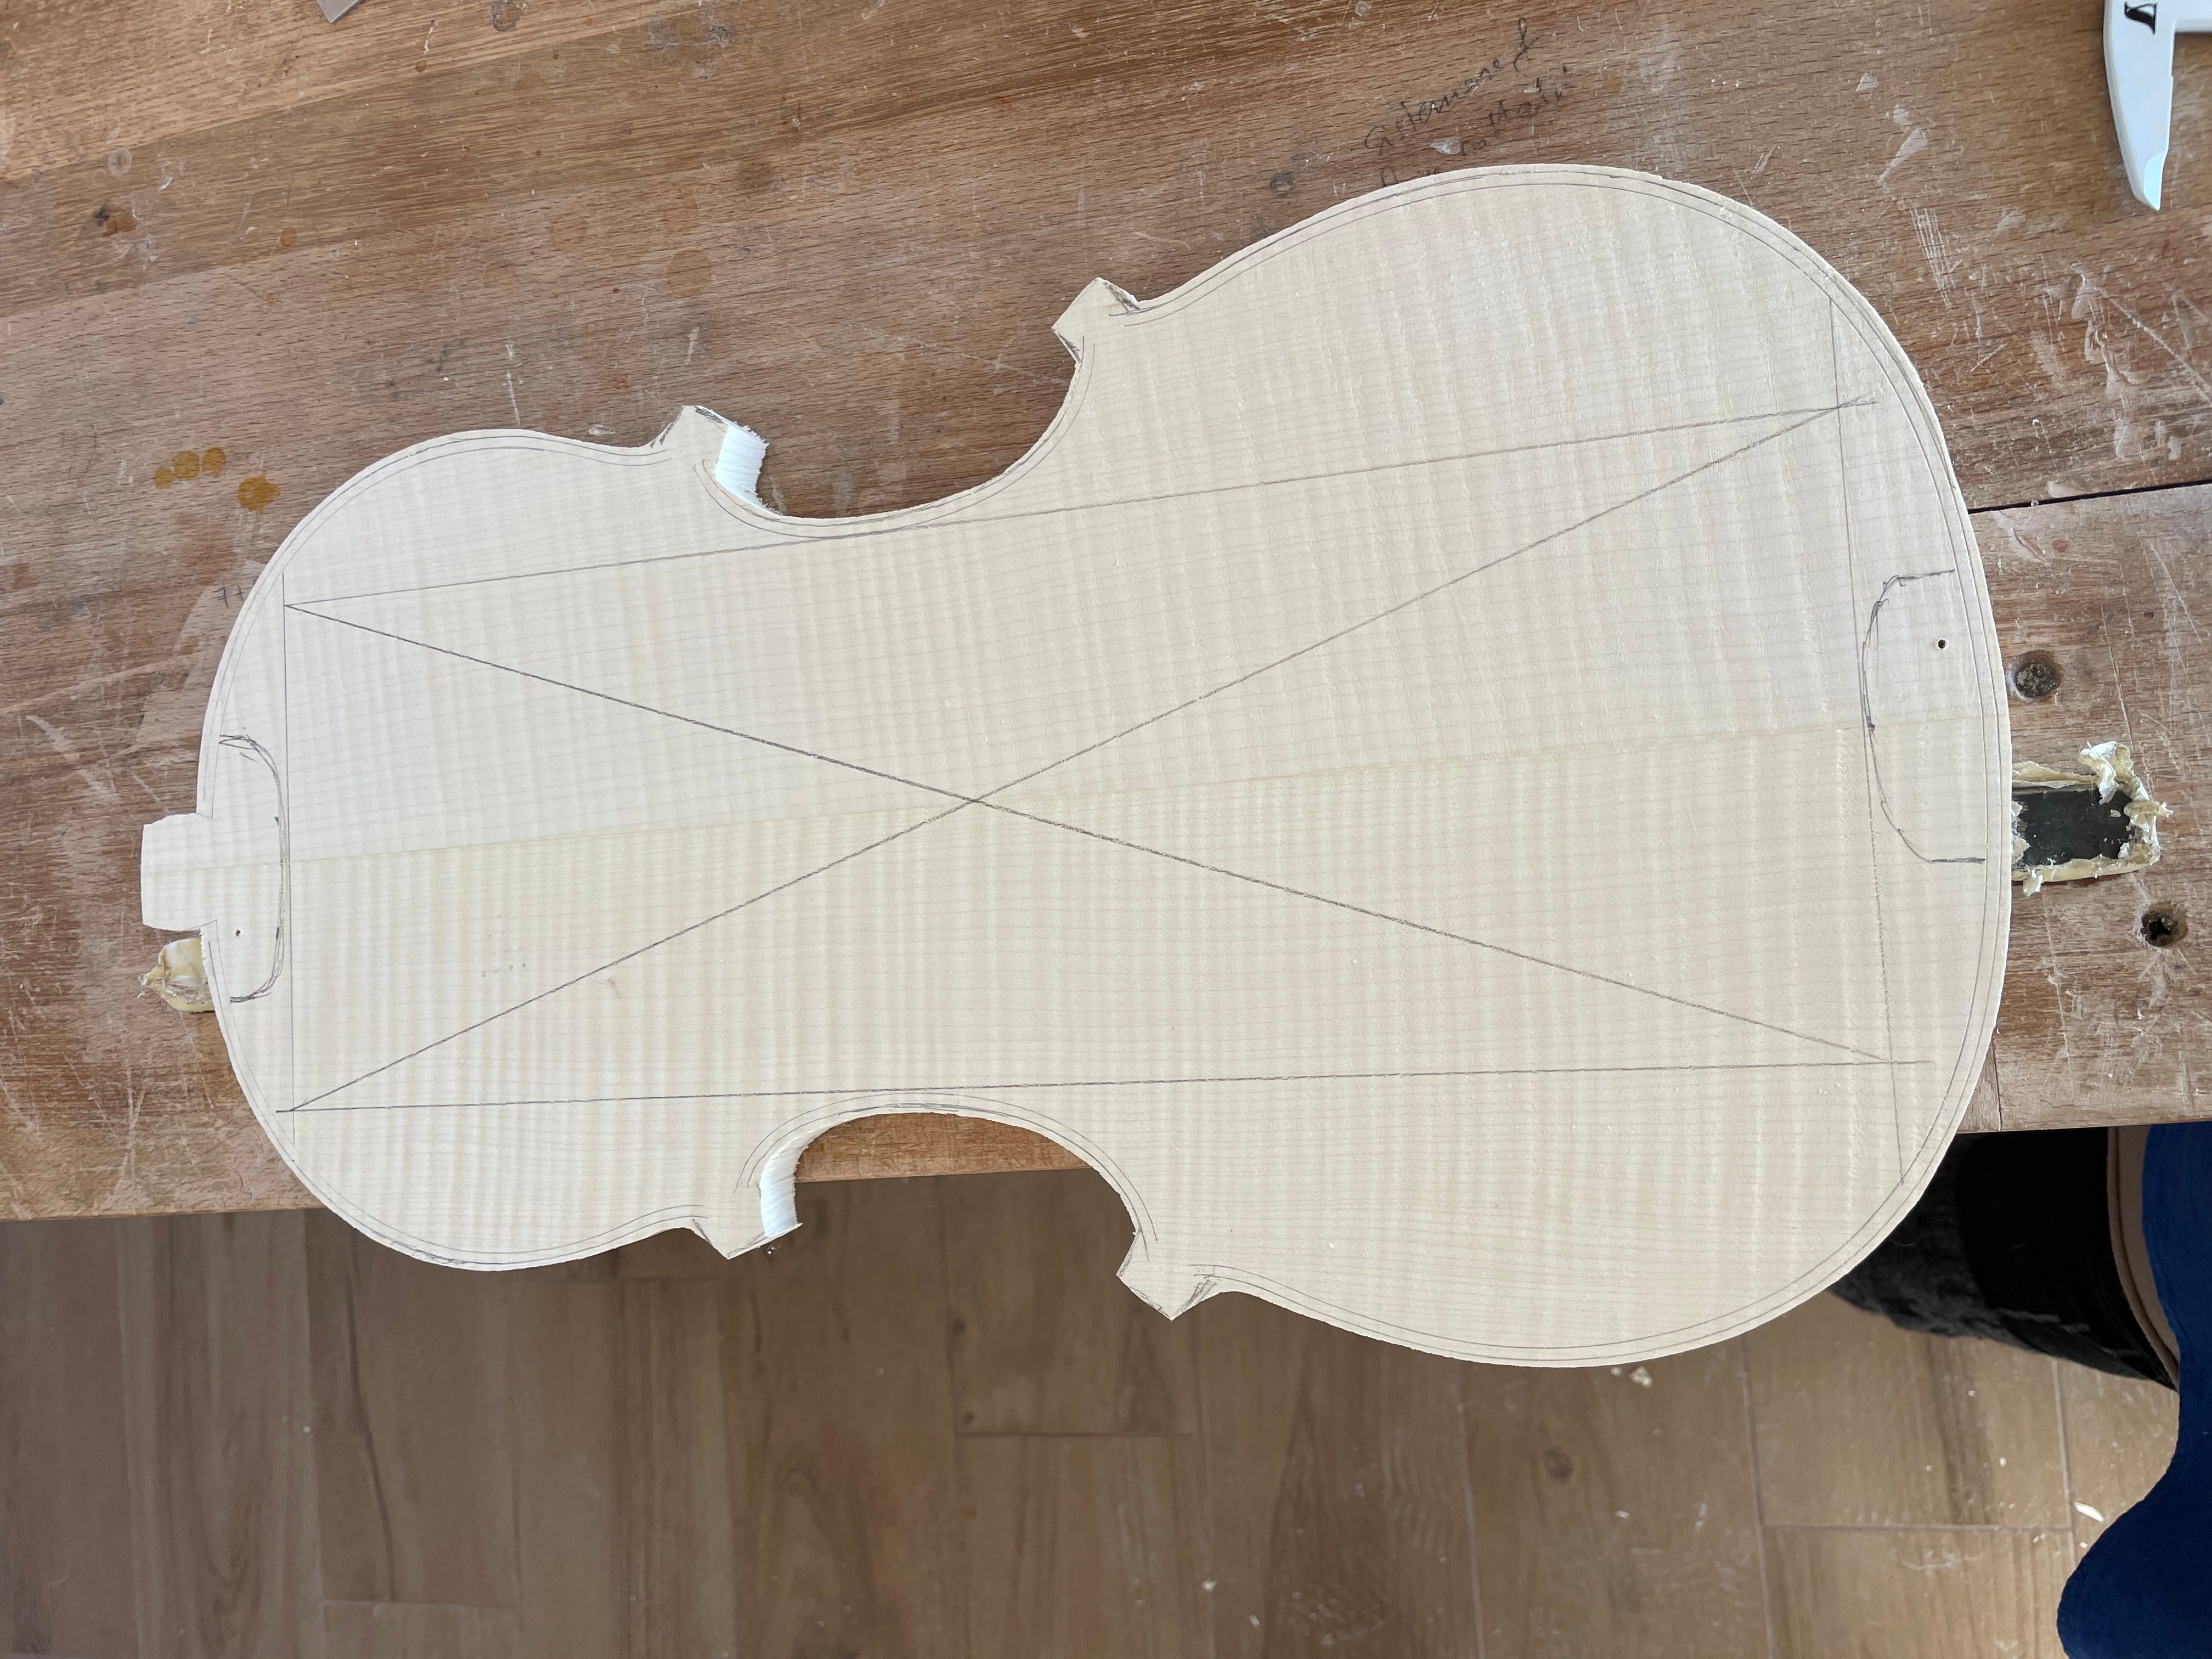
Then, I turn it upside down and mark the outline. I carefully put the ribs structure in the right place and clamp it. I use two wooden pins (toothpicks) so that every time I have to check and mark the lines again, I will be fast and precise in repositioning it. I am not getting mad about positioning the pins in a particular position relative to the purflings. I don’t mind that little dot and will integrate it into the decorations.
I saw the outline roughly, leaving a couple of mm of margin because I will clamp the plate directly between the vice dogs on my bench.
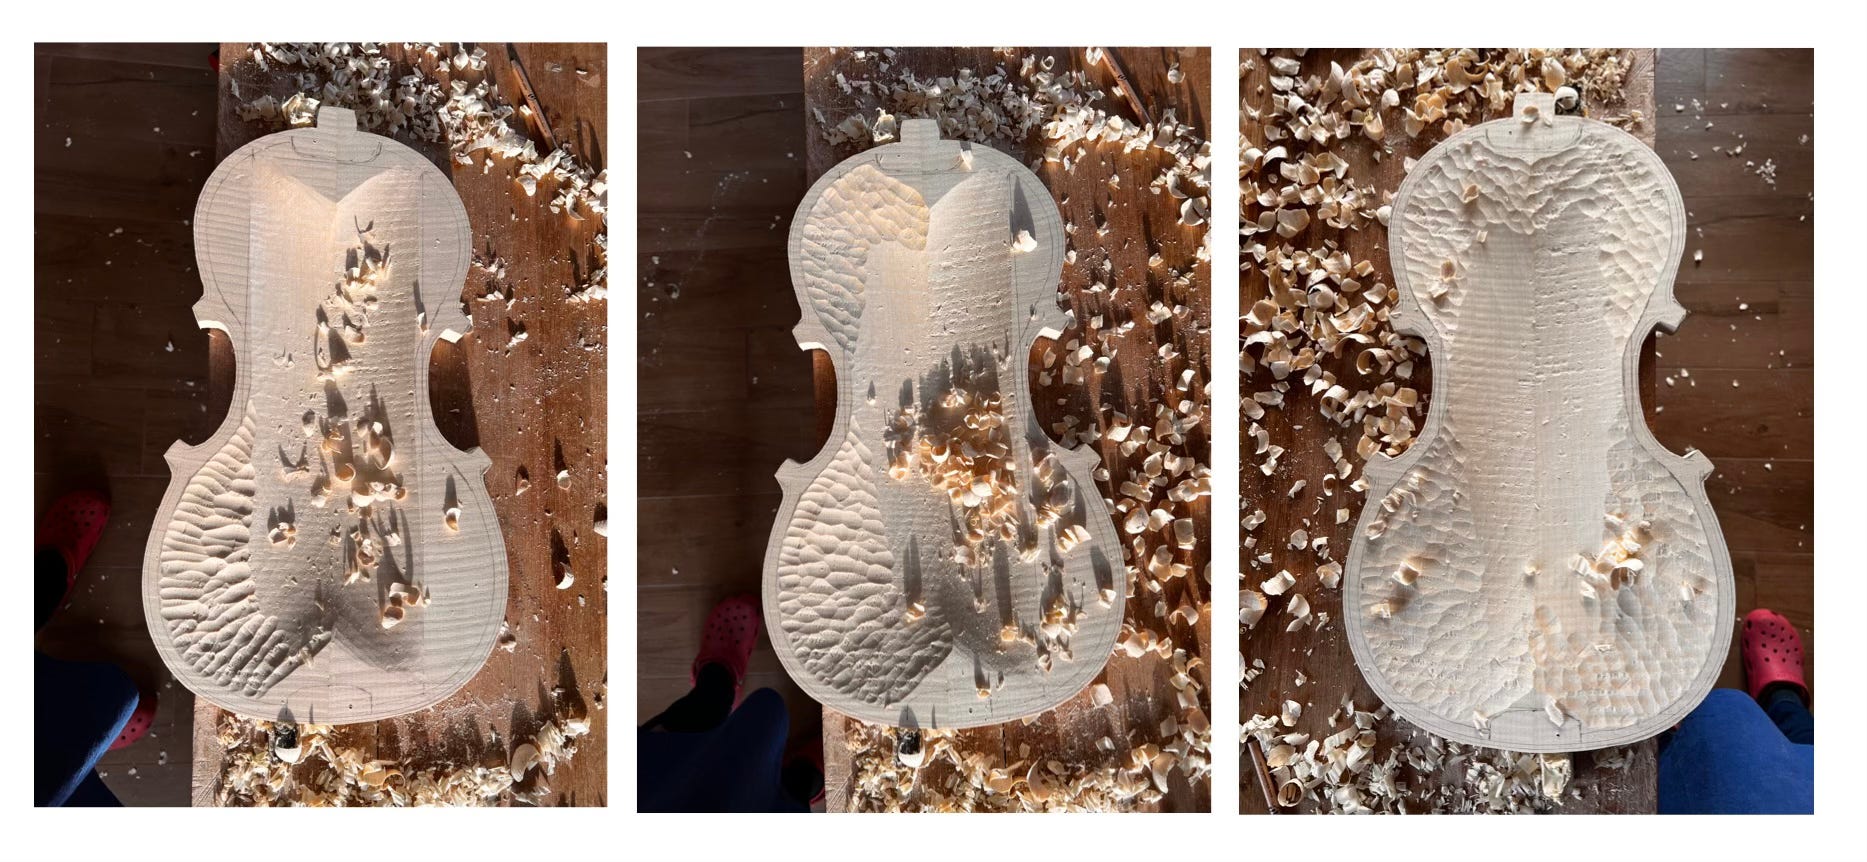
I start working upside down, from the inner part.
I roughly mark another outline, about 6/8 mm inside the ribs line, and the areas of the finished blocks. Then, I inscribe a rectangle in them.
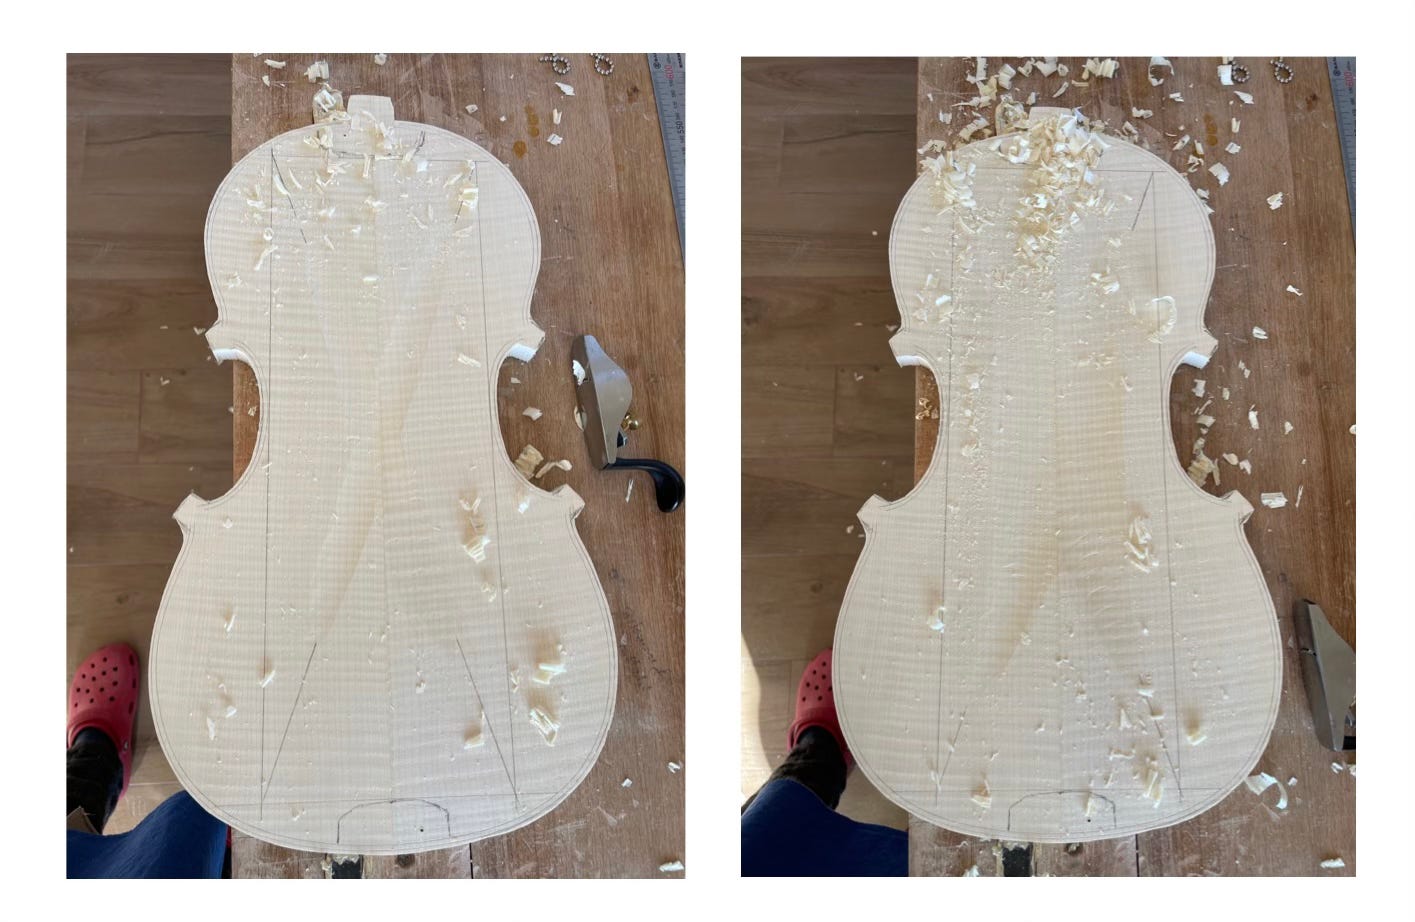
With this lovely small convex-sole squirrel-tail plane, a Lie Nielsen 100 1/2, I start carving on the diagonals of the rectangle. I gradually open the cross to form a tunnel.
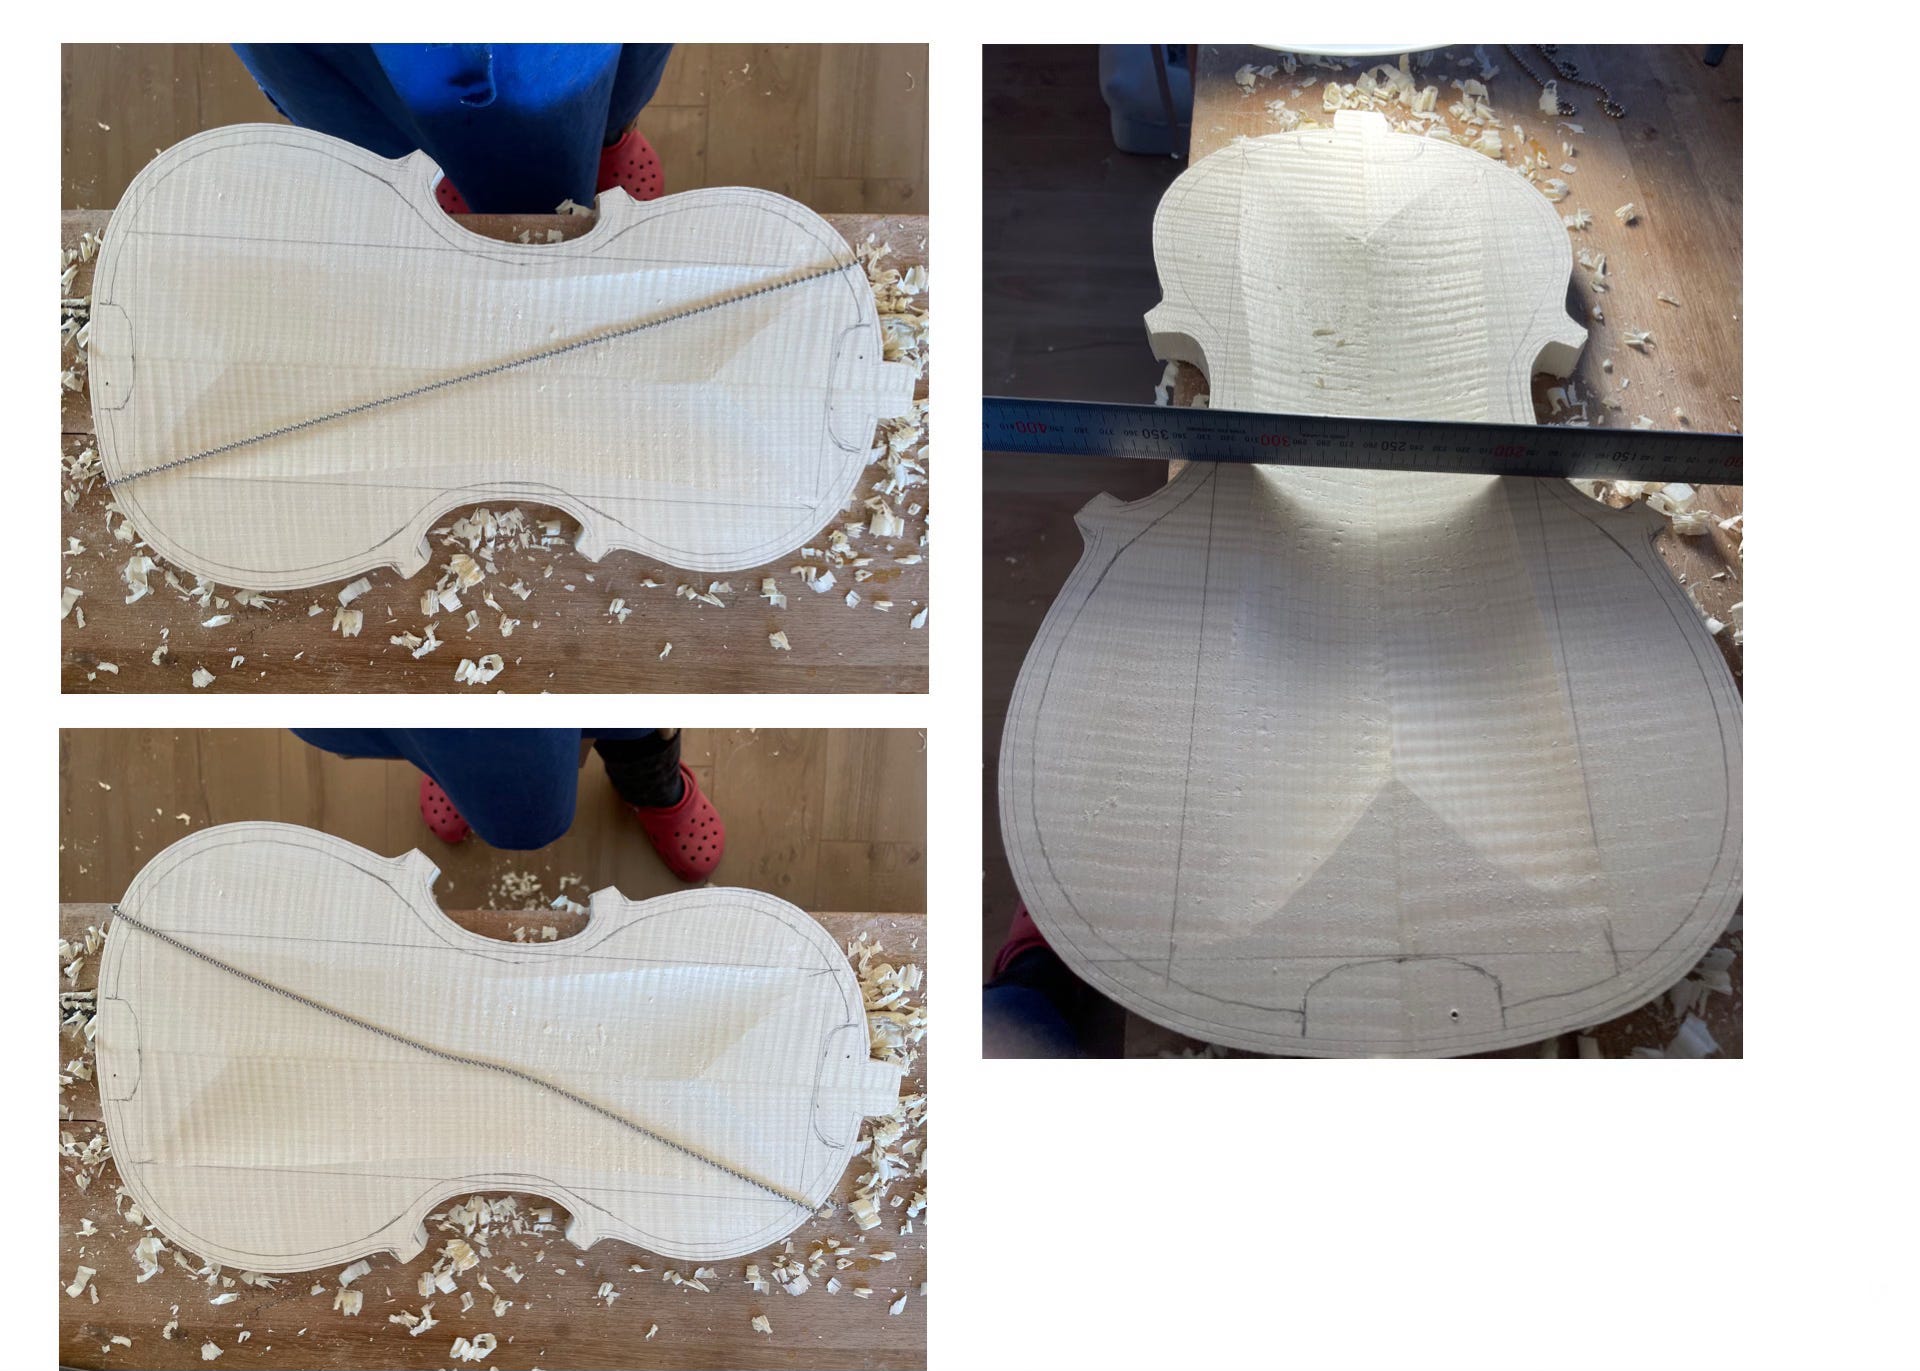
I have two ways to check the symmetries: with a chain that I suspend and let fall on the diagonals, and with a ruler and the white low-angled light of a bench lamp.
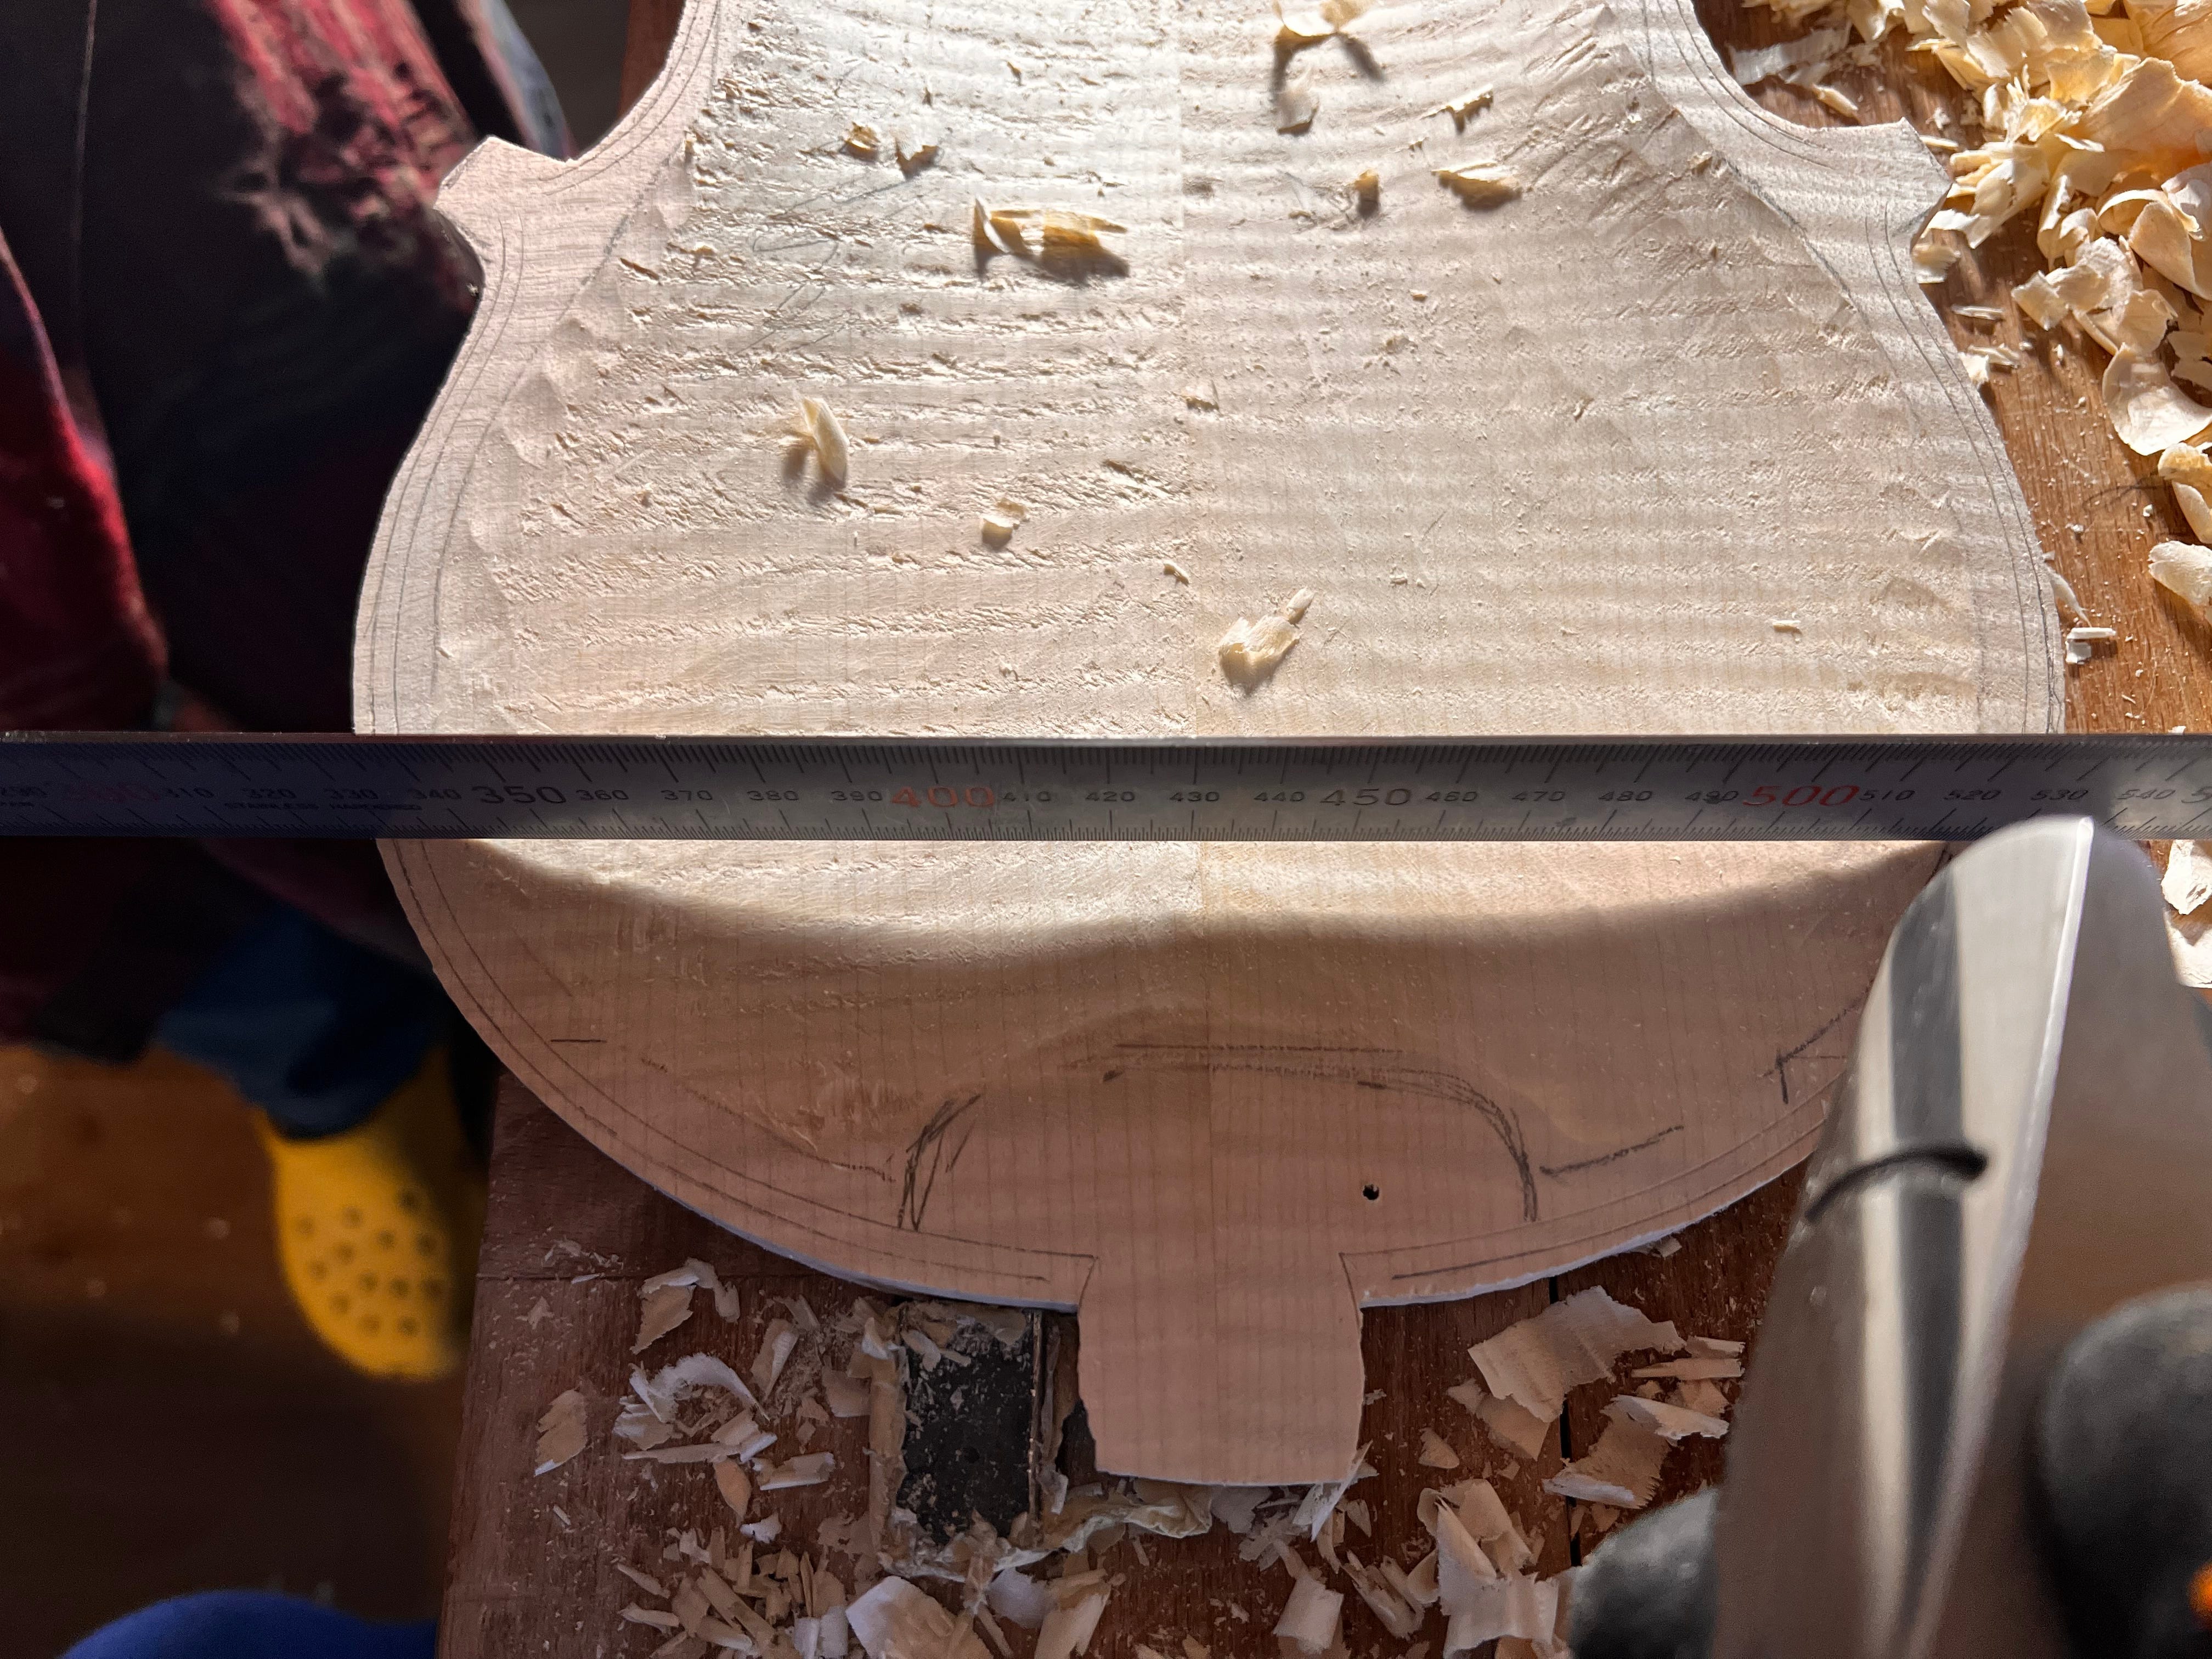
I aim to carve a tunnel, and the convex plane does pretty much a good job. I stop carving when I can measure in the centre the thickness that I planned for, plus 1 mm of margin (for cleaning and scraping).
Then, now using gouges, I start opening on the sides, careful not to touch the rough outline and the block areas. In doing this, I can decide how much of the tunnel I want to leave, whether I want it to be visible from outside as on some Tyrolean or German old instruments, or if I want a more full and gentle arching on the bouts. It’s easy to maintain everything symmetrical and see the volumes and shapes you are obtaining.
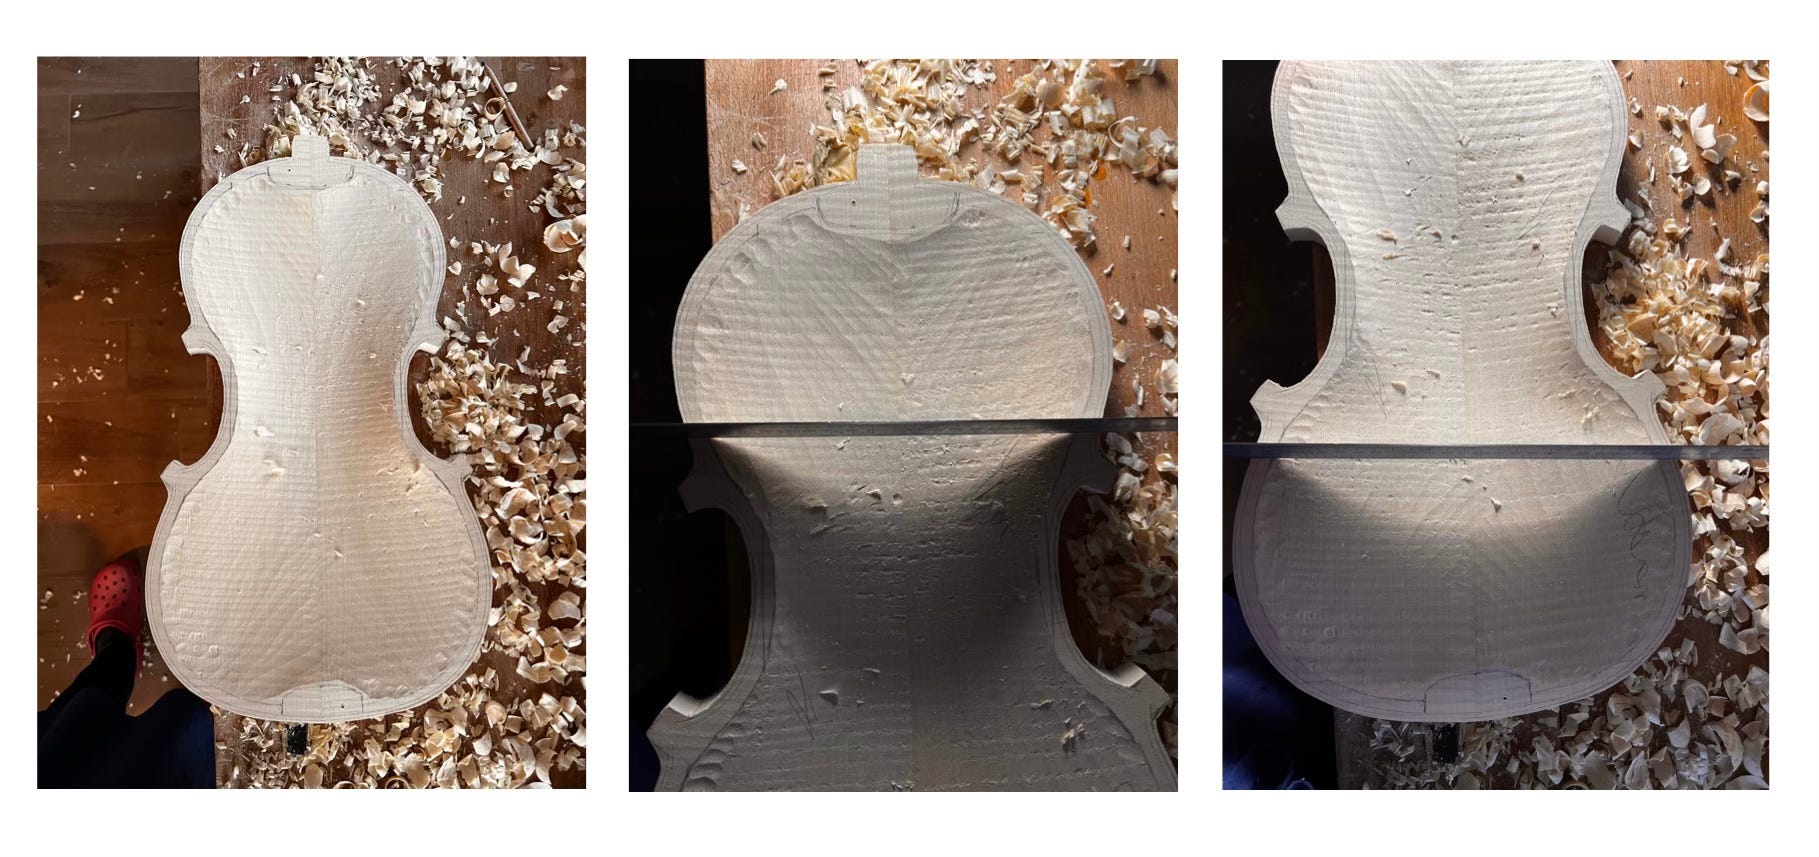
I blend everything with the small convex plane and carefully check the symmetries. In the end, I use a scraper to obtain a nice surface.
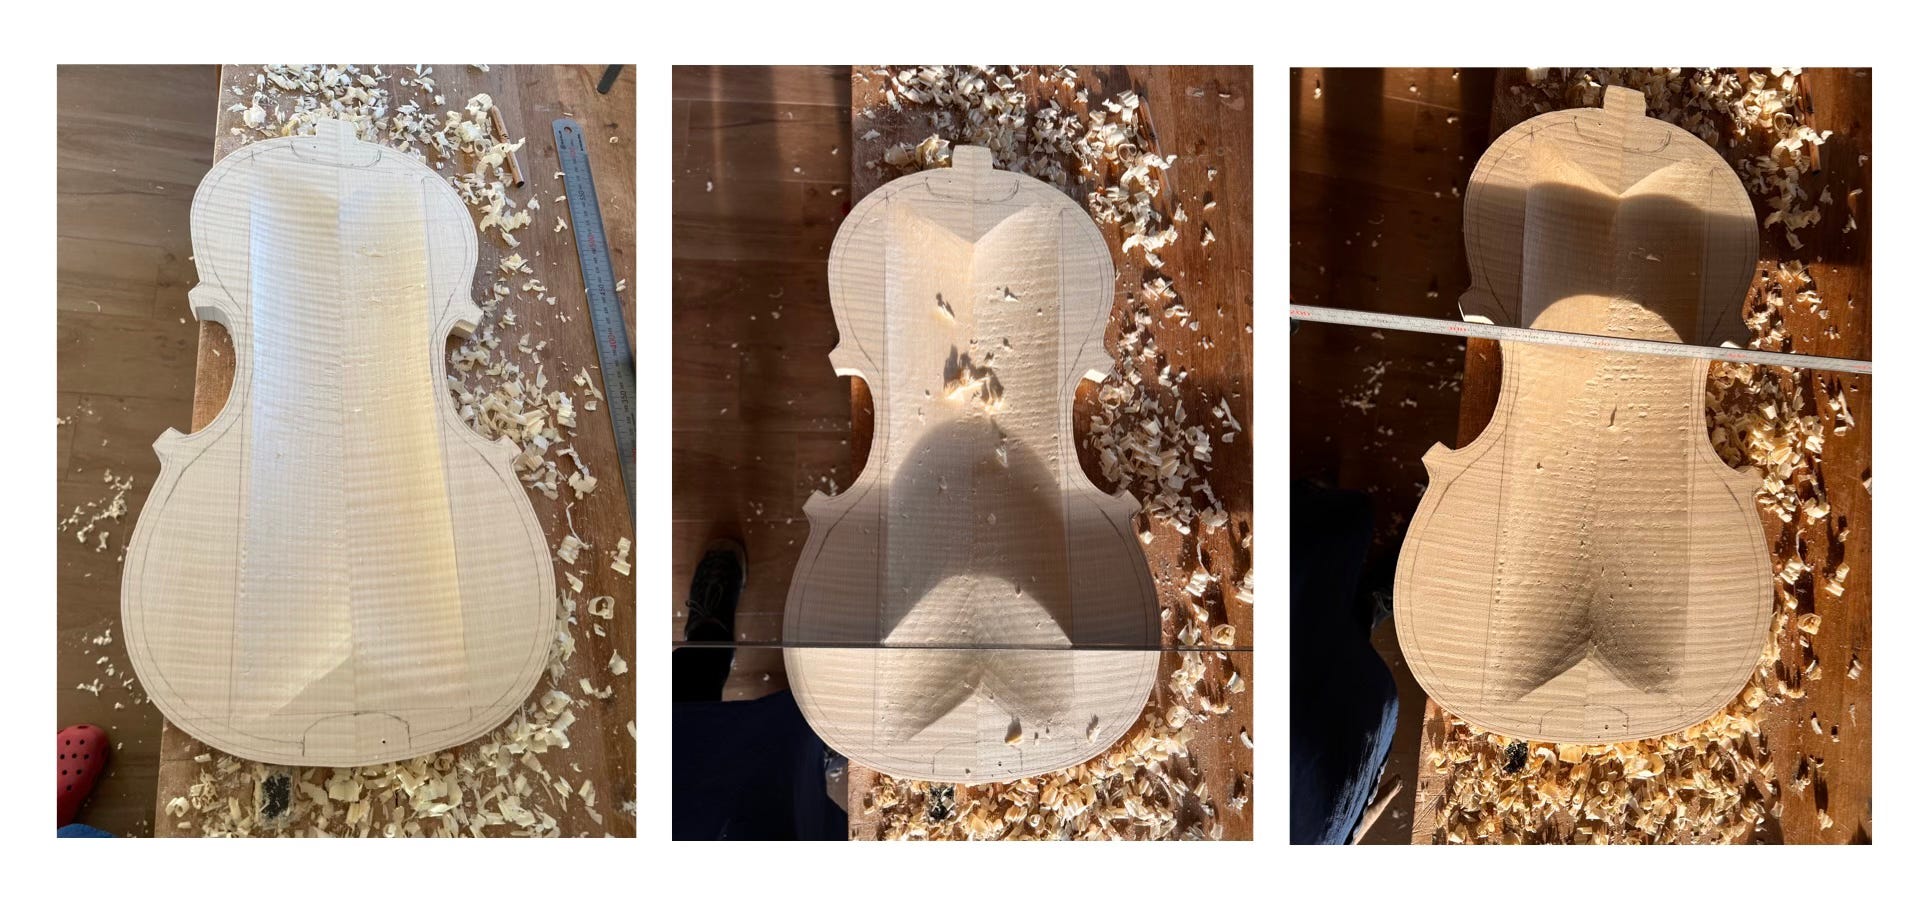
At this point, I start working on the outside.
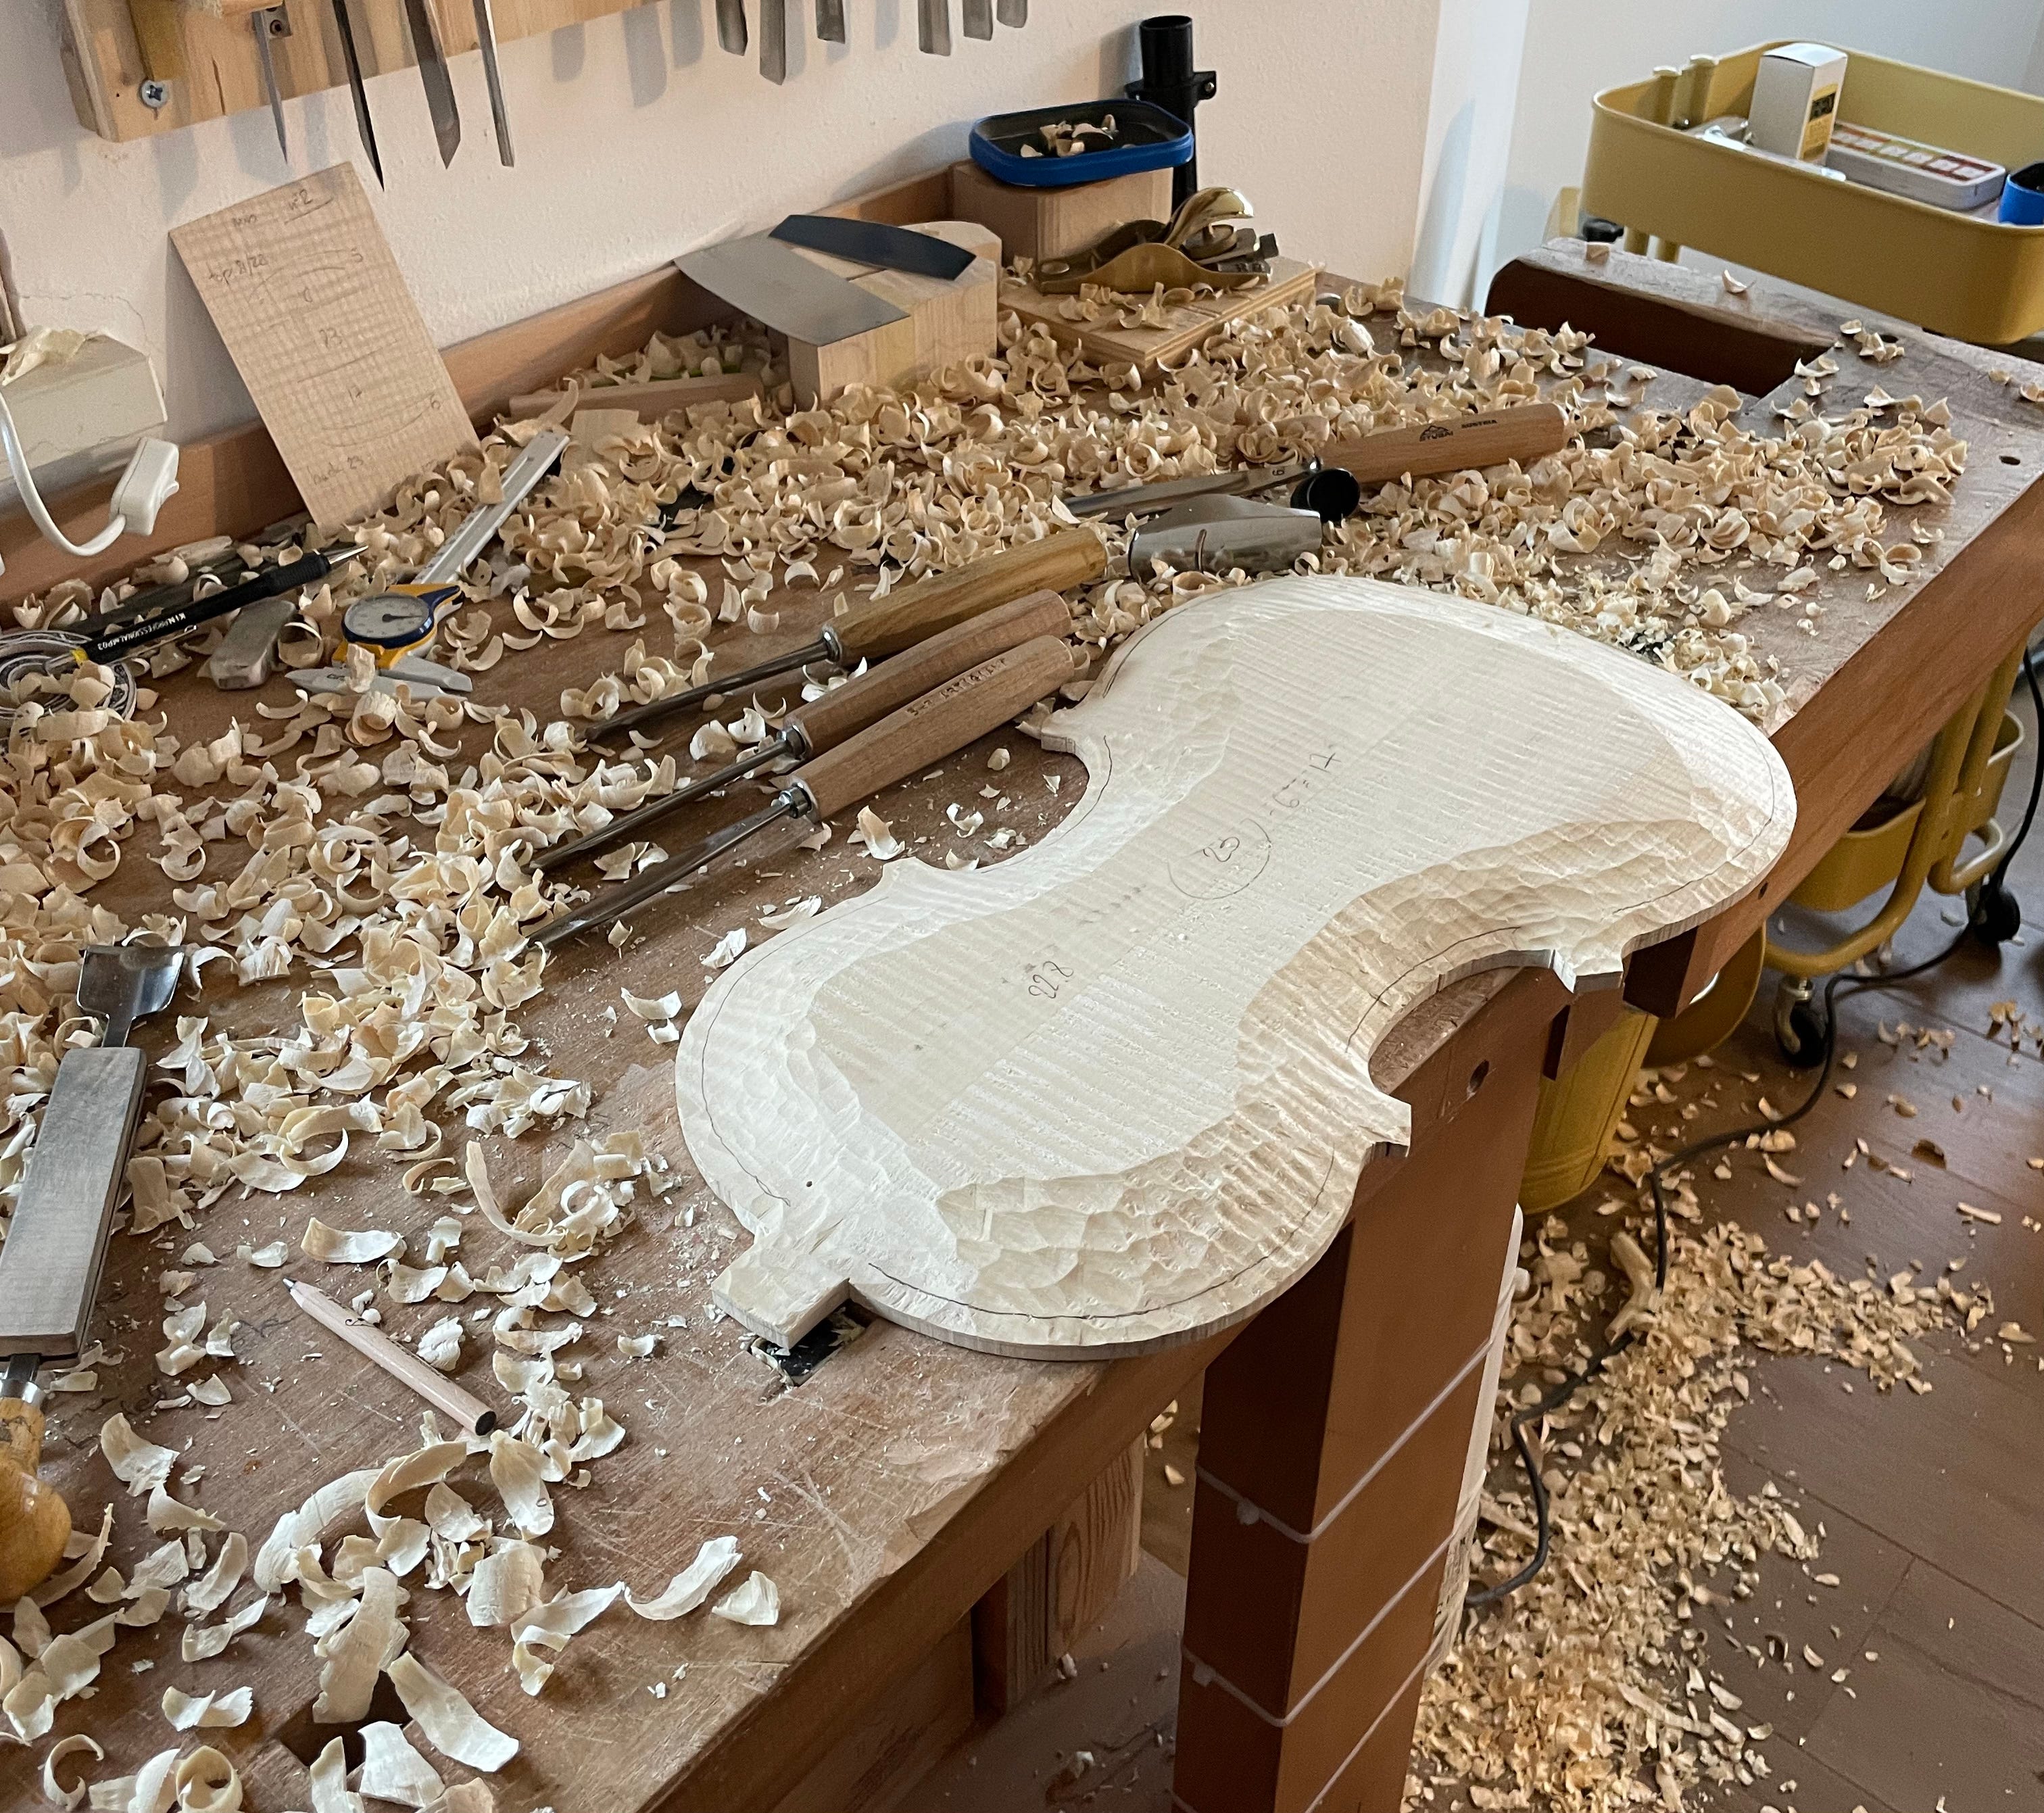
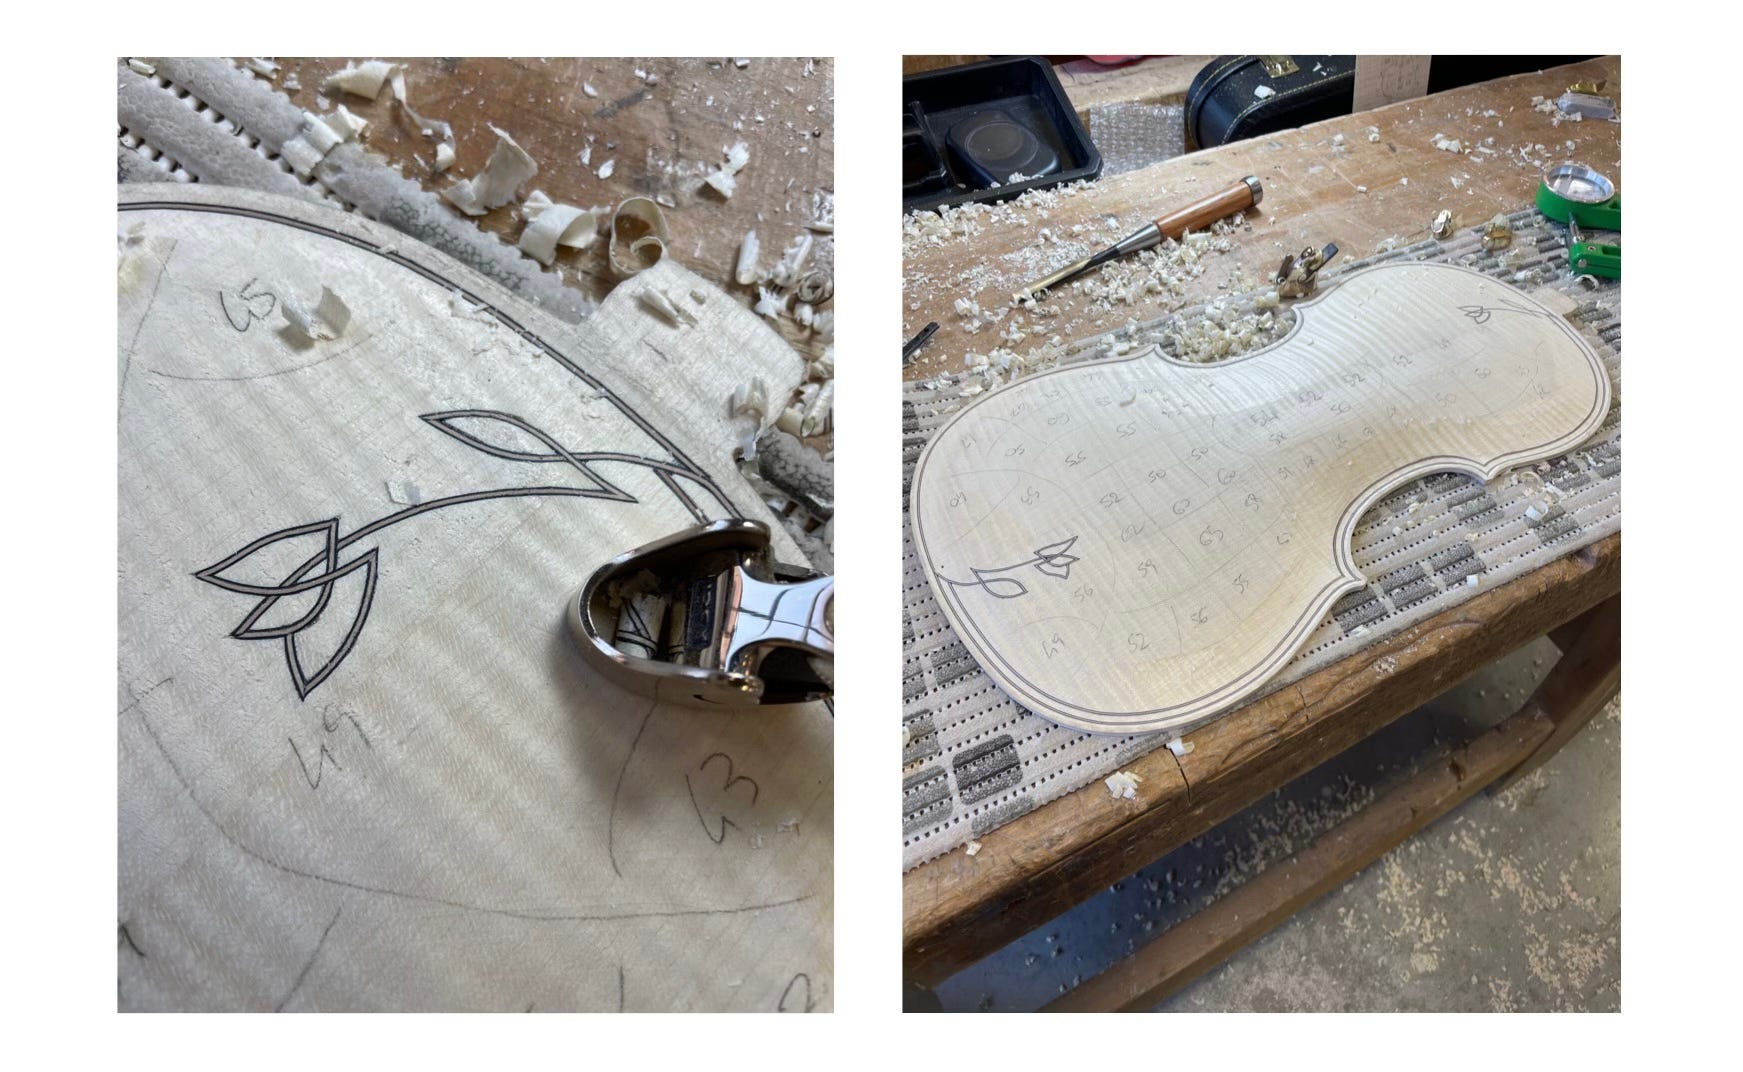
First, I need to bring out and refine the purfling platform. I do it 4.5/5 mm thick (outline/corners and button) or 3.8/4.5.
Then, I start with the long arch. I dig in at the centre and measure thicknesses until I have my 4 points at 6 mm (my planned rough thickness). When I get them, it is very easy to just go in with the gauges and take away the excess wood. Connecting the purfling platform and the long arch already gives you a rough arching. I also use a flat sole plane to clean the long arch and check its regular shape.
Note: (If you are adding purfling decorations, as I am, you’d better go down now to a profile 5 mm thick towards the blocks to avoid risking removing your beautiful decoration work while thicknessing. We’ll be thicknessing mainly from the outside! But be careful, and remember that you have left structural triangles there!)
At this point, I will refine the outline and corners. I hadn’t done it before because I clamped the plate into the bench dogs until this stage. My corners are between 5.5 and 6.5 mm wide.
When the outline is refined, I can mark inside the real glueing surface, leaving 3.5 mm for the ribs and linings and removing the rest.
Then, it’s purflings time!
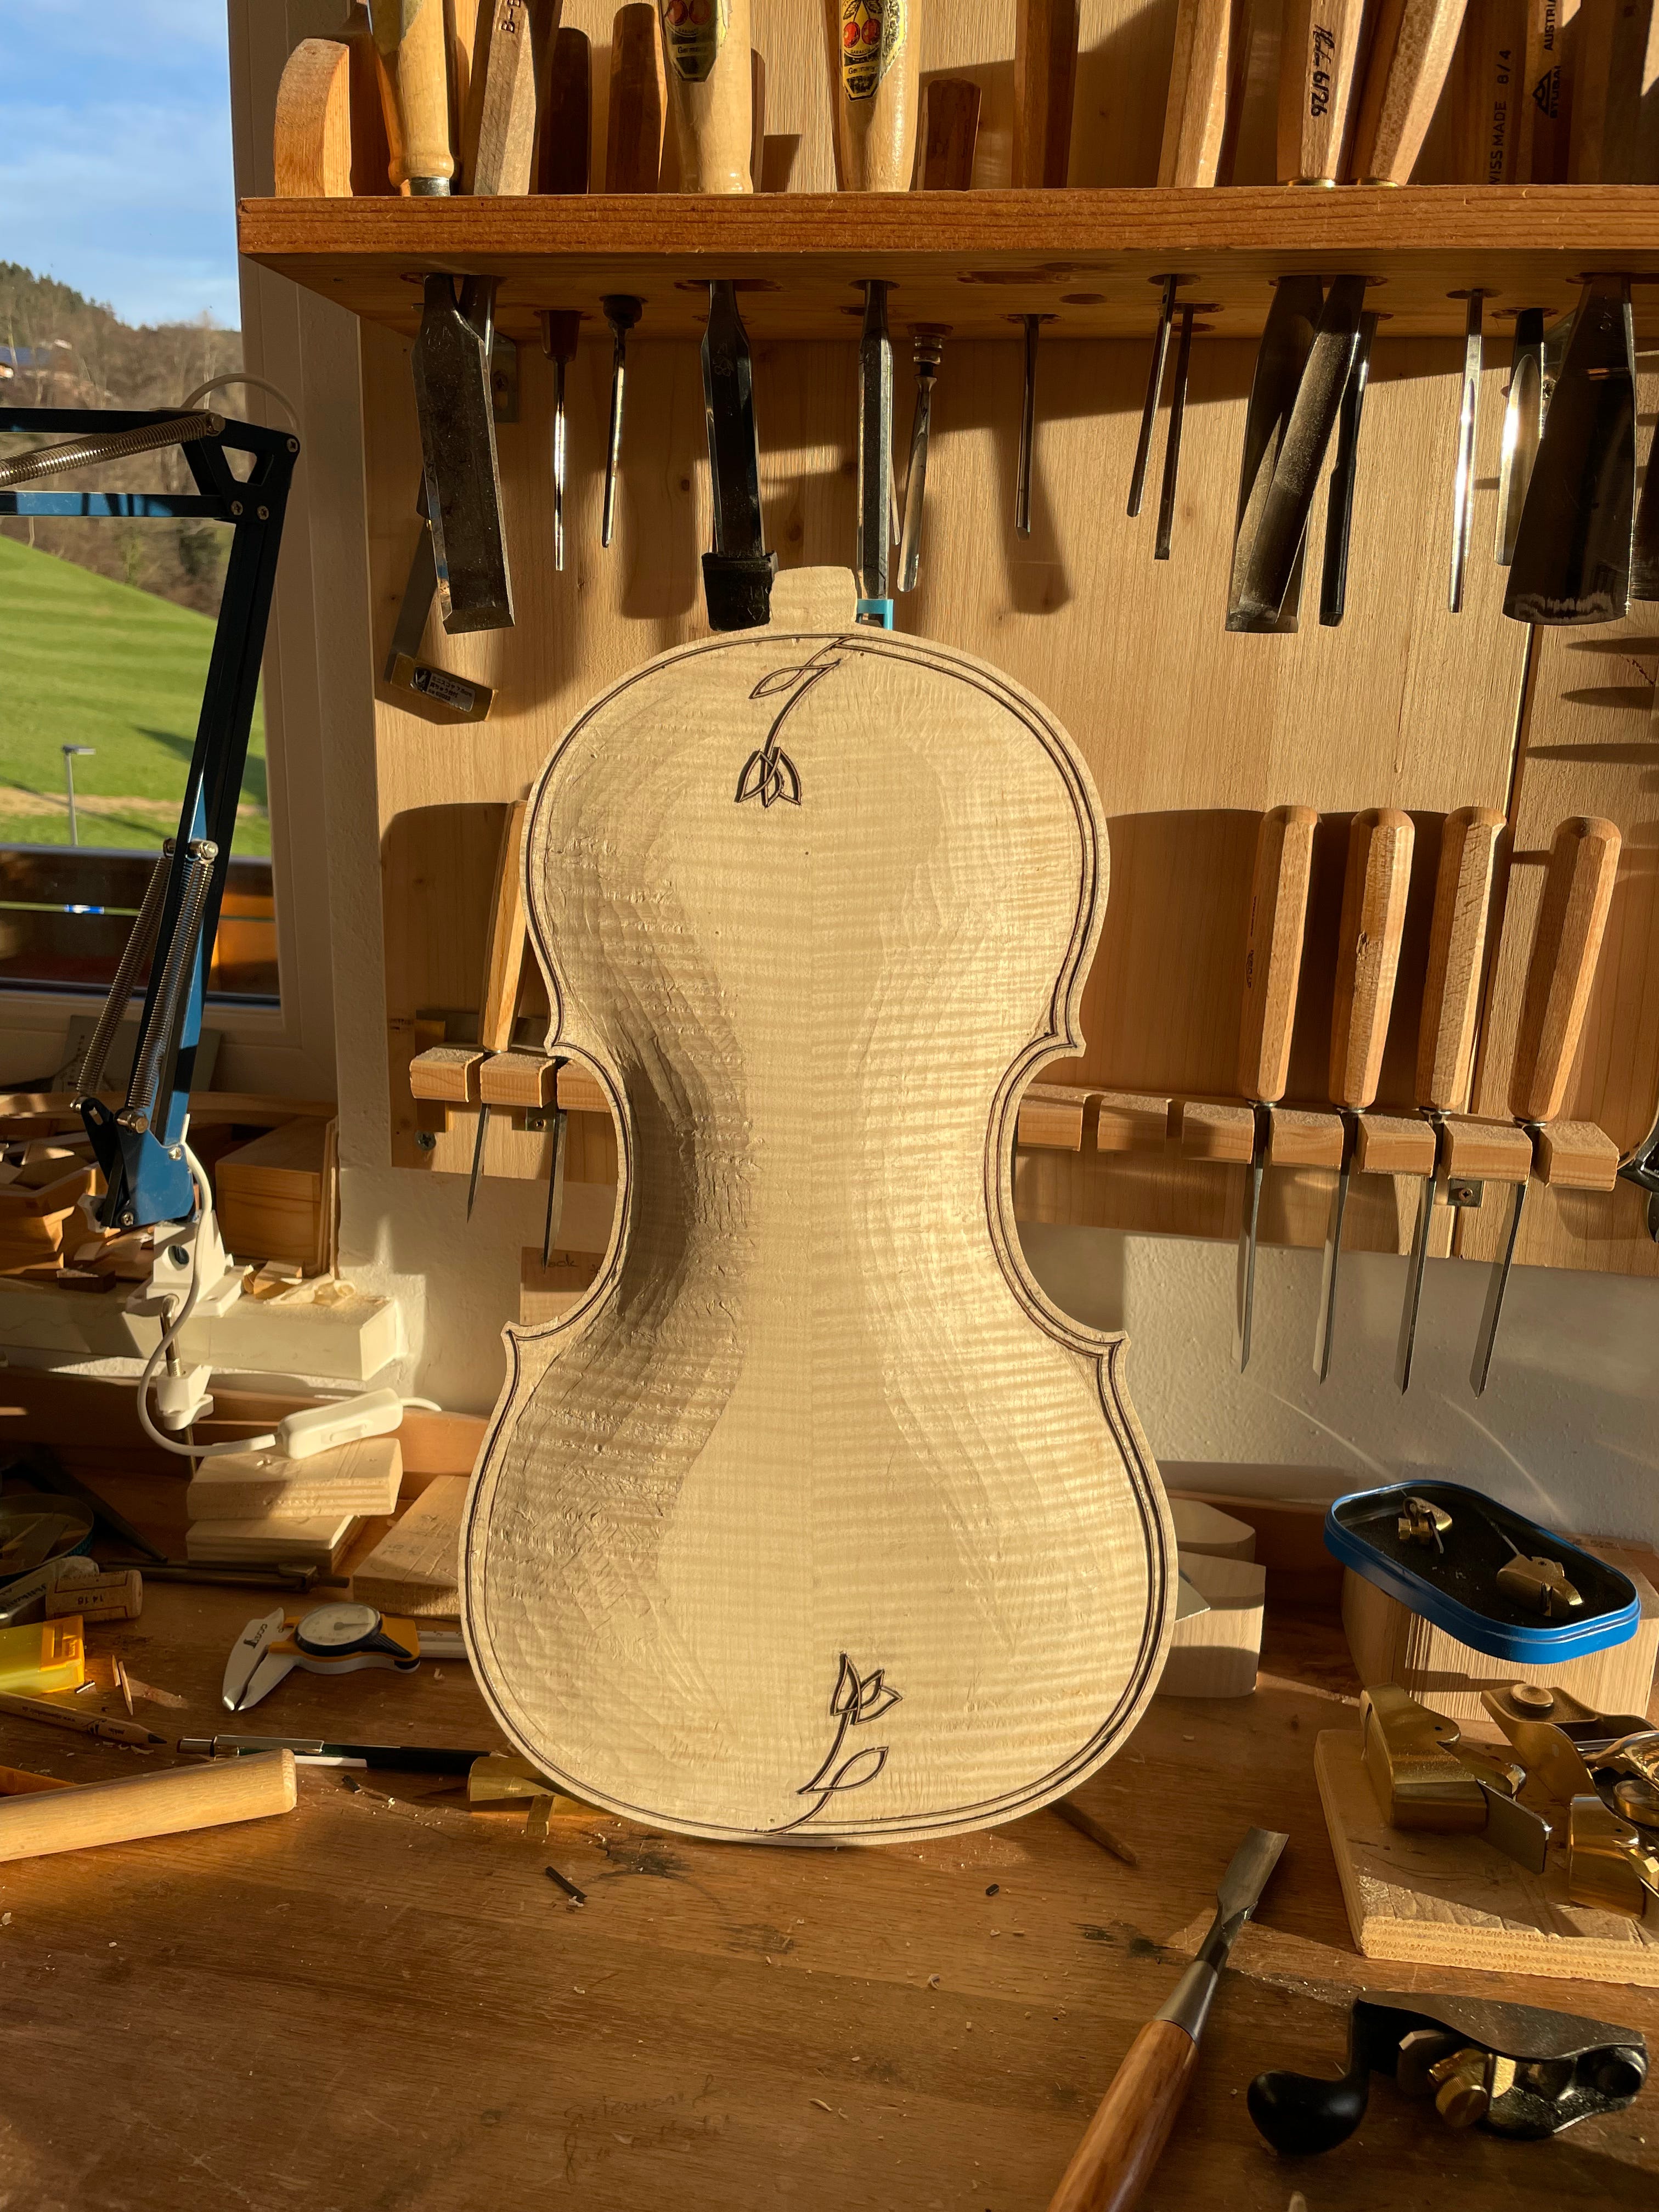
After that, I carve the fluting and connect it with the long arch. At this point, I usually end up with a pretty even thickness: it’s still thick, but it’s easy to work with an even starting point.
I now start with fine thicknessing: I measure and mark it outside and feel the elasticity. Always working from outside, getting thinner on the lungs or bouts, you naturally get elegant cross archings.
Of course, eyes come first! If I don’t like the shape I’m getting outside, I am totally free to take off some wood inside.
Thicknesses:
I include below here pictures of our notebook so you can see the thicknesses of some of our instruments with which we were particularly pleased.